Tutorial: From lens to projector
Learning-oriented. Follow along start to finish — by the end you will have projected a real image onto the wall. About 30 minutes.
In this tutorial you'll start with the simplest optical instrument there is — a single lens used as a magnifying glass — and end with a working projector that throws an enlarged, upside-down image of a real sample onto the wall.
You don't need to understand the theory first. Just build it and look. (If you get curious afterwards, How images form explains what you saw.)
What you need
From the CoreBox:
- The two 50 mm lens cubes and the 100 mm lens cube
- The −50 mm lens cube (for one quick experiment)
- The sample holder cube with one of the prepared samples
- The torch and its holder
- 4 puzzle base plates
- Something with small print (this page, a ticket, a coin)
projector-parts.jpgTODO (Benedict): bright flat-lay of exactly these parts, each labelled. Embossed focal-length numbers on the lens cubes must be readable in the photo.
Every lens cube has its focal length printed on the lens holder: 50, 100 or
-50 (millimetres). If you can't see the number, rotate the insert —
Open and reconfigure a cube shows how.
Step 1 — Use a lens as a magnifying glass
Take one 50 mm lens cube out of the box. Hold it close to this text and look through it.
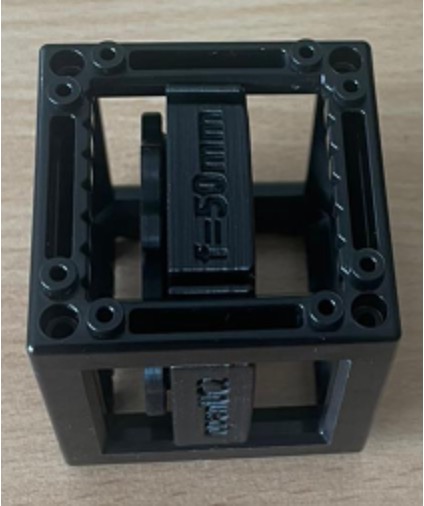 A single lens cube used as a magnifier.
Now slowly pull the lens away from the page while you keep looking through it.
- Close to the page: the text is upright and enlarged. This is the magnifier effect.
- Past about 5 cm (the focal length!): the image gets blurry, then flips upside-down.
That flip distance is the focal length. You just measured ~50 mm without a ruler.
Step 2 — Compare the other lenses
Look at the same text through the 100 mm lens and then the −50 mm lens.
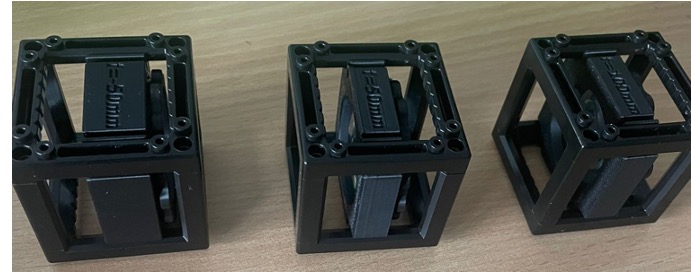 Different focal lengths, different magnification.
- The 100 mm lens magnifies less and flips further away — longer focal length.
- The −50 mm lens never magnifies: the image is always smaller and upright. A diverging lens cannot form a magnified image on its own — but you'll need exactly this behaviour later for the Galilean telescope.
Step 3 — Build the projector
Now we make the image real — one you can catch on a wall.
- Click two puzzle base plates together.
- Put the sample holder cube (with a prepared sample, sample centred) on one plate.
- Put a 50 mm lens cube on the other plate.
- Click two more plates on top of the cubes for stability.
- Point the lens side at a light-coloured wall about 30 cm away.
projector-assembled.jpgTODO (Benedict): photo of the two-cube projector, taken slightly from above, with the torch in position and the sample visible.
For the sharpest image, the curved (bulging) side of the lens should face the wall — the side where the light travels the longer distance. If your image looks smeared towards the edges, open the cube and flip the lens insert.
TODO (Benedict): confirm the mounting convention of the CoreBox lens inserts and add a close-up photo showing the correct orientation.
Step 4 — Switch on and focus
Place the torch in its holder directly behind the sample and switch it to its brightest constant mode (press the button repeatedly to skip the blink modes). Dim the room light if you can.
Now slide the lens gently back and forth inside its cube until the image on the wall snaps into focus.
You should see the sample enlarged, sharp — and upside-down.
You did it. That picture on the wall is a real image: actual light rays from the sample, re-sorted by the lens so they meet again on the wall. A cinema projector is exactly this, just with a stronger lamp.
Try this: predict the image with one formula
Measure the distance sample→lens () and lens→wall (). The lens equation says
With the 50 mm lens ():
| sample→lens | predicted lens→wall | magnification |
|---|---|---|
| 60 mm | 300 mm | 5× |
| 75 mm | 150 mm | 2× |
| 100 mm | 100 mm | 1× |
Move the setup, refocus, measure again — the numbers really do come out. When the image is sharp, you have measured the lens equation.
What's next?
- Why is the image upside-down? → How images form
- Measure a focal length properly → Measure a focal length
- Ready for two lenses? → Build a telescope