How images form
Understanding-oriented. The single most useful page in this documentation: one lens, one formula, every regime.
The same 50 mm lens projects a cinema-style image onto the wall or works as a magnifying glass — depending only on how far away the object is. This page explains why.
The ray construction, animated
Take an object (green arrow), draw the three principal rays from its tip, and the image sits where they cross. Watch what happens as the object moves closer to the focal point:
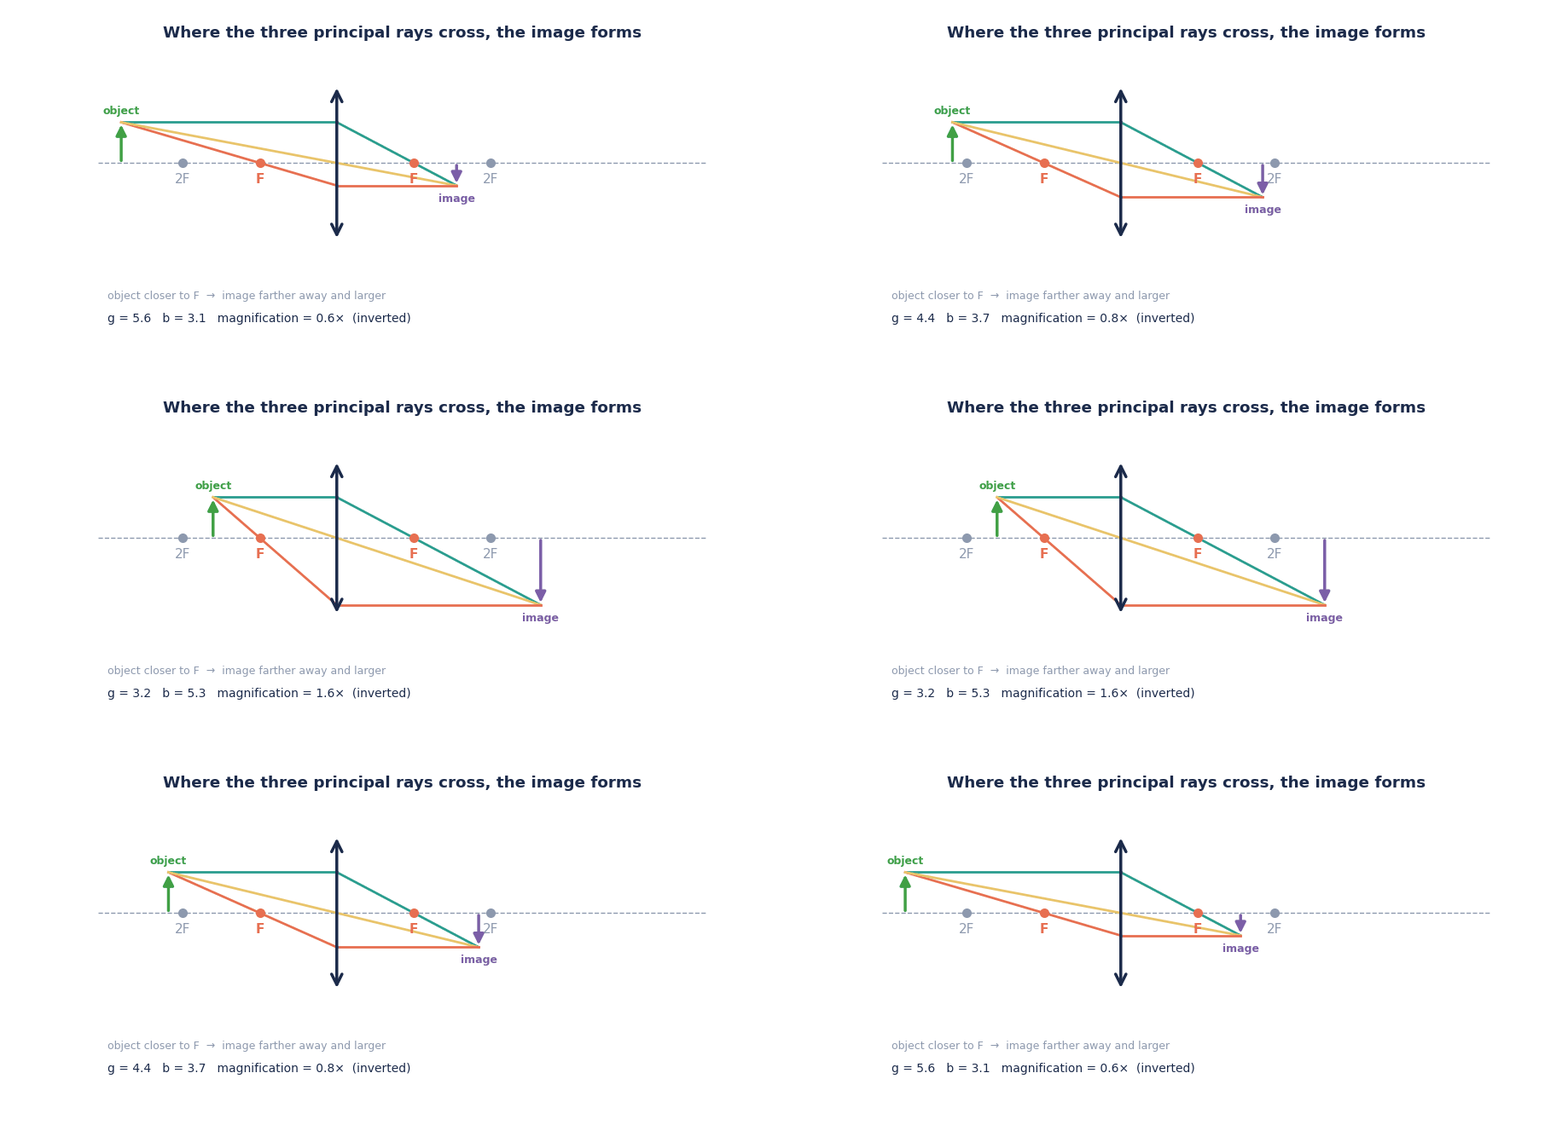
Two things to notice:
- The image is upside-down (and left-right swapped). Rays from the top of the object end up at the bottom — an unavoidable property of a converging lens.
- As the object approaches F, the image races away and grows. At F it disappears to infinity.
Real vs. virtual — the most important distinction in optics
A real image exists where light rays actually meet. You can put a screen there and see it — the projector does exactly that.
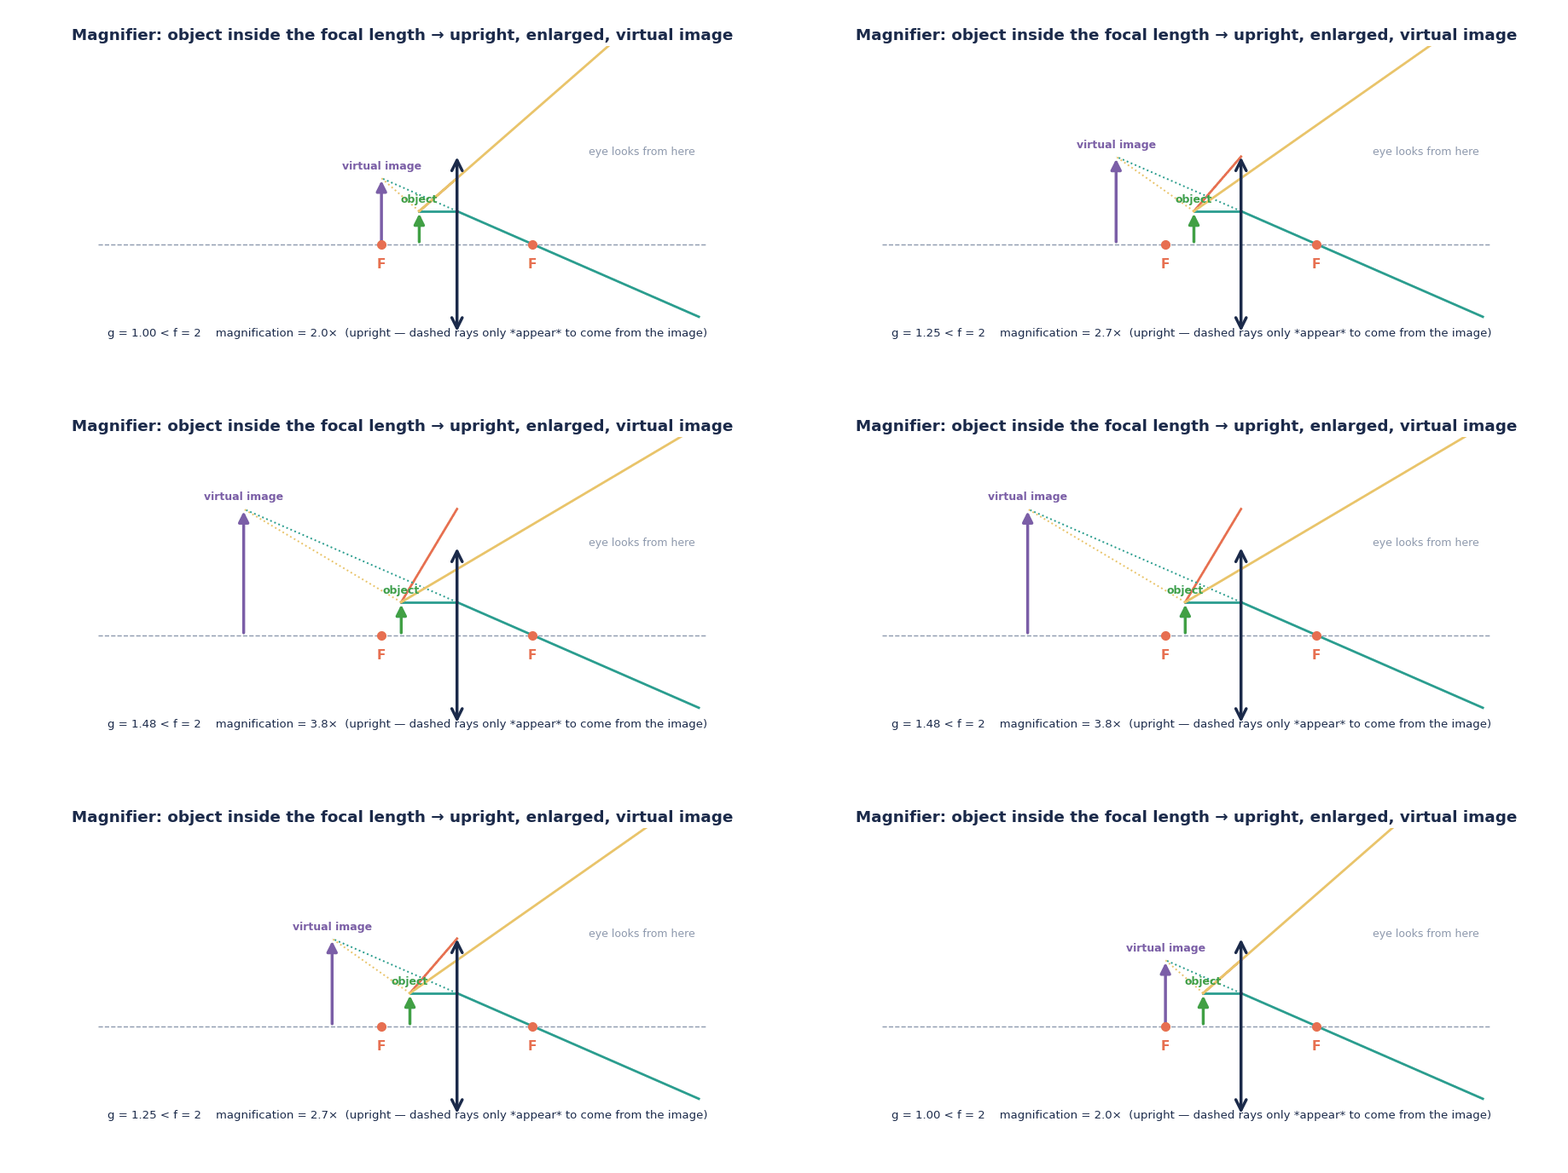
A virtual image is different: the rays never meet, they only appear to come from a common point when your eye traces them backwards. You can see a virtual image by looking into the lens — but a screen at its position shows nothing, because no light is there.
Move the object inside the focal length and the real image is gone; instead an upright, enlarged, virtual image appears — the magnifier effect:
The lens equation
All of this — position, size, orientation — follows from one formula relating focal length , object distance and image distance :
with the lateral magnification
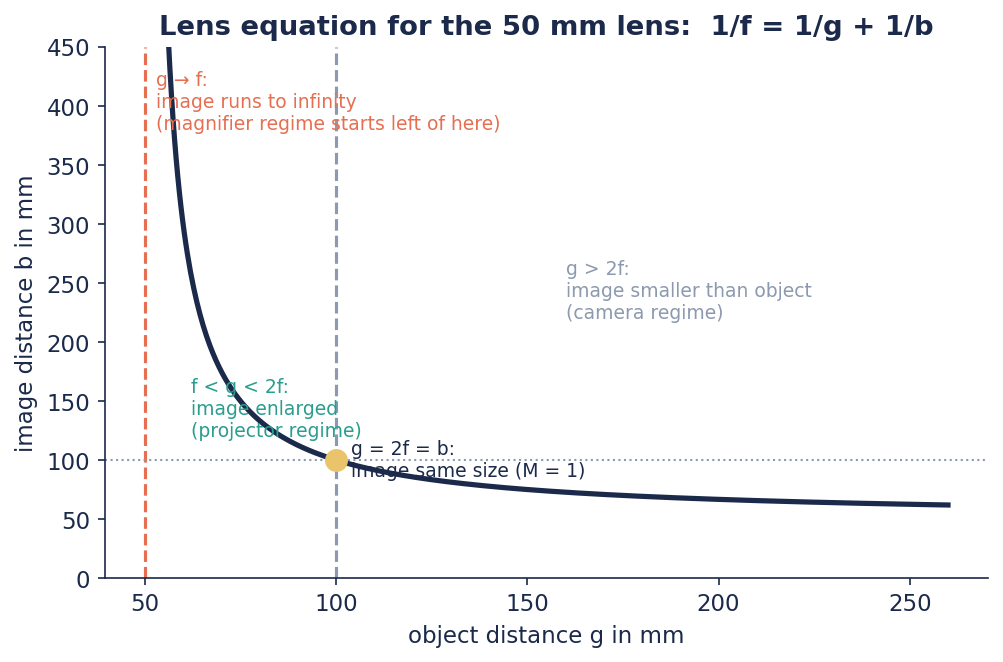
Here is the whole behaviour of the 50 mm lens in one curve:
| Object distance | Image | Instrument |
|---|---|---|
| real, inverted, smaller | camera, eye | |
| real, inverted, same size | 1:1 relay | |
| real, inverted, enlarged | projector, microscope objective | |
| no image (rays parallel) | collimator, "infinity" | |
| virtual, upright, enlarged | magnifier, eyepiece |
The projector, quantitatively
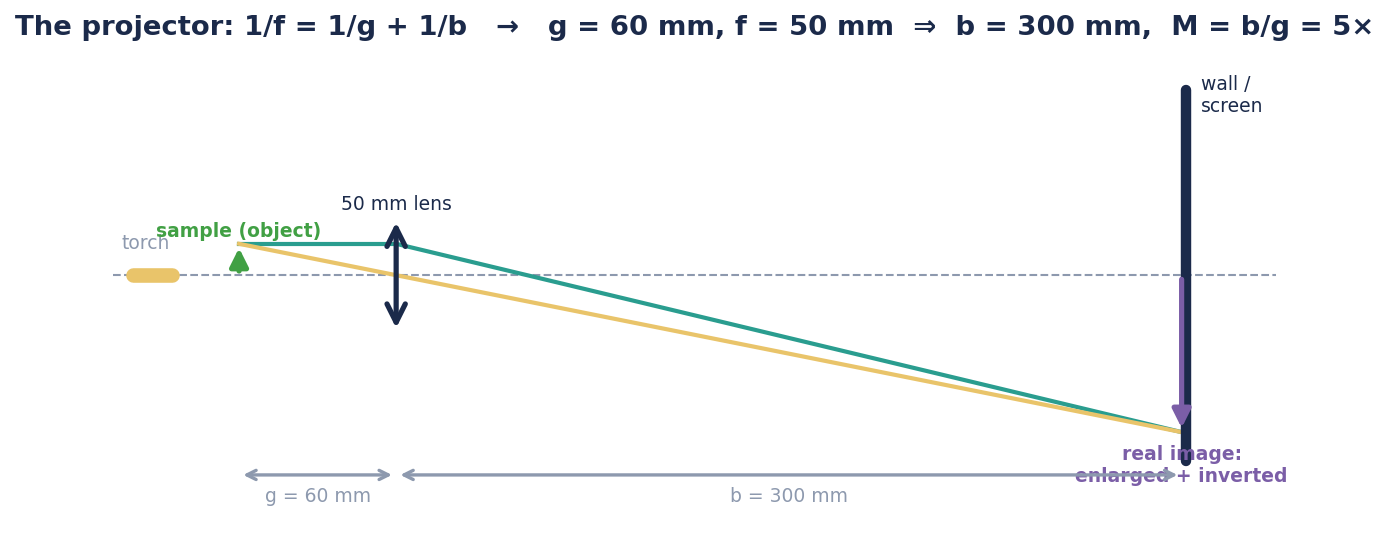
With the sample 60 mm from the 50 mm lens, the equation predicts the image 300 mm away and 5× enlarged — and that's what you measure in the tutorial. A cinema projector is the same diagram with only a hair above : tiny film frame, huge wall, in the hundreds.
Why does the magnifier magnify?
What limits how big something looks is the angle it takes up at your eye. You can enlarge that angle by bringing the object closer — but closer than about 250 mm (the standard "near point"), your eye can no longer focus.
The magnifier's trick: with the object inside the focal length, the lens creates a virtual image far away that your relaxed eye can comfortably focus — while covering the large angle of the close-up object. The standard measure compares against the 250 mm near point:
So the 50 mm lens gives 5×, the 100 mm lens 2.5× — and the 4× microscope objective (f = 32 mm) used as a loupe about 8×. Shorter focal length, more magnification; that's the entire arms race of microscopy in one sentence.
Confirm f = 32 mm for the shipped 4× objective (stated in the old docs; a 160 mm DIN 4× objective would nominally be nearer 40 mm).
Where this shows up in the CoreBox
| Idea on this page | You'll meet it in… |
|---|---|
| Real image + lens equation | From lens to projector |
| Real intermediate image | Build a telescope (Kepler), every microscope |
| Virtual image / magnifier | every eyepiece in the box |
| : parallel rays | infinity microscope |
Next: How telescopes work →